KUKA
In Stock OK
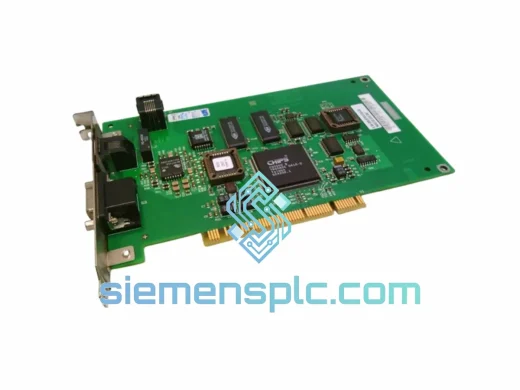
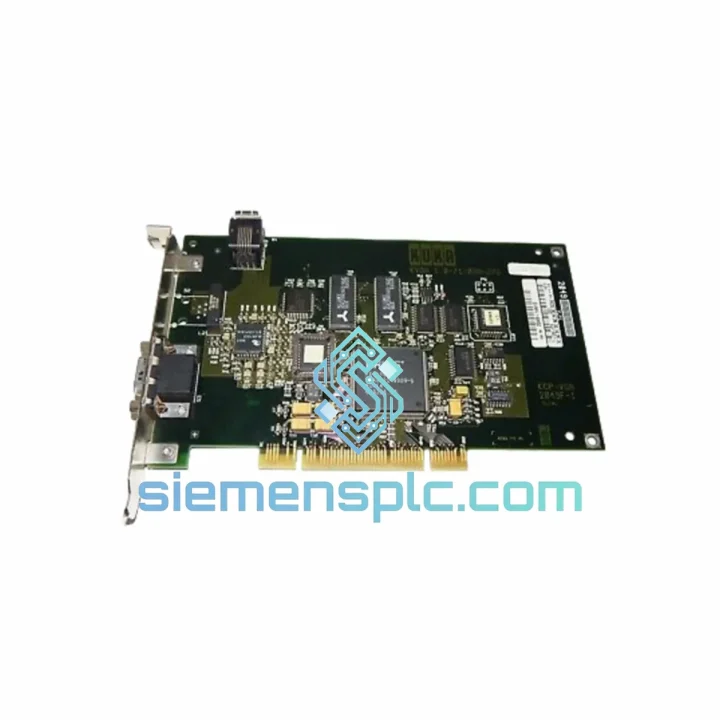
KUKA KVGA-1.0 Video Interface Card
Request verified availability, condition, replacement risk review, packing options and courier lead time for KVGA-1.
BrandKUKA
Part NumberKVGA-1
ConditionAvailability Check
Lead TimeRFQ Confirmation
DocumentsDatasheet / photos by RFQ
ShippingExport packing available
Auto-filled RFQ
KVGA-1
Click Request Quote and the part number is inserted into the inquiry form automatically.
- Reply by email: [email protected]
- WhatsApp / Tel: +86 18359268345
- Mon-Sat 9:00-18:00 GMT+8
Procurement Data
Key Product Information
Core fields for model confirmation and RFQ routing. Detailed product narrative remains below.
- Brand
- KUKA
- Primary Part Number
- KVGA-1
- Product Type
- Robot Controller Spare Part
- Product Family
- Other series
- Manufacturer
- KUKA Robotics (Germany)
- Country of Origin
- DE
- Model Function
- VGA / Video signal interface for robot controller HMI output
- Catalog Category
- HMI Panels
- Operating Temp.
- 0 °C to +55 °C (controller cabinet ambient)
Model confirmed for inquiry
KVGA-1
Send quantity, destination and urgency. The RFQ form keeps this part number attached.
Request Quote
Product Overview
KUKA KVGA-1.0 Video Interface Card — Every Minute of Blackout Costs You Money. We Ship Today.
Your KRC2 or KRC4 controller just went dark. The teach pendant is blank. The line is stopped. You’ve already ruled out the KCP cable and the power supply — the KVGA-1.0 video interface board is the culprit, and you need a verified replacement in your hands before the next shift. That’s exactly what we do.
We stock the KUKA KVGA-1.0 in Xiamen and ship via DHL Express or FedEx Priority worldwide. Most orders clear customs and arrive at your facility within 3–5 business days. No broker delays, no sourcing uncertainty — just a confirmed part number, a tracking number, and your line back in production.
URGENT REQUIREMENT? Contact: [email protected] | WhatsApp: +86 18359268345
Quick Technical Datasheet
| Parameter | Value |
|---|---|
| Part Number / SKU | KVGA-1.0 |
| Manufacturer | KUKA Robotics (Germany) |
| Series | KVGA — Video Interface Card Series |
| Function | VGA / Video signal interface for robot controller HMI output |
| Compatible Controllers | KUKA KRC2, KRC4 (verify cabinet revision before ordering) |
| Form Factor | PCB board module — direct slot replacement |
| Interface | Internal VGA bus connector to operator panel / teach pendant |
| Operating Temperature | 0 °C to +55 °C (controller cabinet ambient) |
| Weight | ~1,110 g (packaged) |
| Country of Origin | Germany (OEM) |
| Condition | New OEM / Tested Refurbished — specify at inquiry |
| Stock Status | ✔ Ready to Ship — Xiamen Warehouse |
| Lead Time | Same-day dispatch on orders confirmed before 14:00 CST |
Troubleshooting & Replacement Tips
After ten years of field calls, the KVGA-1.0 failure pattern is consistent. Here’s what you need to know before you pull the board.
Symptom Confirmation
A failed KVGA-1.0 typically presents as a completely black operator panel or teach pendant screen immediately after power-on, with no backlight activity. The controller itself may boot normally — you’ll hear the drives initialise and the safety circuit close — but the display stays dead. If the KCP2 pendant shows a faint backlight but no image, suspect the VGA cable first. No backlight at all points directly to the KVGA board or the panel power rail.
Pre-Replacement Checks
- Measure 24 VDC on the panel power connector before condemning the board. A blown fuse on the KPS600 auxiliary rail kills the display without triggering a drive fault.
- Reseat the internal VGA ribbon connector on both ends. Vibration-induced connector fretting is a common false positive in high-cycle welding cells.
- Check the KRC2 BIOS POST sequence via the serial debug port if accessible — a POST hang before video initialisation indicates a deeper motherboard issue, not the KVGA card.
Replacement Procedure
- Isolate the robot cell and lock out the KRC cabinet main breaker. Confirm zero energy with a meter — the KVGA board sits near the PC section which retains capacitor charge briefly after shutdown.
- Ground yourself with an ESD wrist strap before touching the PCB. The KVGA-1.0 is sensitive to electrostatic discharge; a single ungrounded touch can damage the replacement board before it’s installed.
- Document the existing board’s slot position and connector orientation with a photo. The KRC2 PC section has multiple similar-looking boards and incorrect reinstallation of adjacent cards is a common post-maintenance fault.
- Remove the four M3 retention screws and slide the board out along the card guide rails. Do not flex the PCB — the VGA output stage components are surface-mounted and fragile under mechanical stress.
- Install the new KVGA-1.0, seat the VGA ribbon connector firmly, and torque the retention screws to finger-tight plus a quarter turn. Over-torquing cracks the PCB mounting holes.
- Power up and verify display output before closing the cabinet. If the display remains blank, check the VGA cable continuity — a pinched cable during reassembly is the most common post-replacement fault.
Firmware & Configuration Notes
The KVGA-1.0 carries no user-configurable firmware. There are no DIP switches, no address settings, and no software initialisation required after installation. The board is purely passive in the signal path — it either works or it doesn’t. No KUKA WorkVisual project reload is required for a like-for-like board swap.
Common Fault Codes Associated with KVGA Failure
- KSS 00027 — Communication error to operator panel. Often triggered when the KVGA board fails mid-operation rather than at startup.
- KSS 01246 — HMI process not responding. Can appear when the video subsystem fails to initialise during KSS boot sequence.
- Silent failure (no fault code) — The most common scenario. The controller runs, the program executes, but the operator has zero visibility. This is a production safety issue, not a convenience issue.
Reliability in Harsh Conditions
The KVGA-1.0 was designed for the inside of a KRC robot controller cabinet — an environment that most commercial electronics would not survive a single shift in. KUKA’s engineering specification for this board addresses the three primary failure drivers in industrial electronics: vibration, thermal cycling, and moisture ingress.
The PCB substrate uses a high-Tg laminate rated for continuous operation at elevated temperatures, with conformal coating on the signal layers to resist condensation during cold-start cycles in unheated facilities. Solder joints are wave-soldered to IPC Class 2 standards with additional hand-touch on the high-stress connector terminations — the failure points that typically give out first on cheaper aftermarket boards.
Vibration resistance is achieved through the card guide rail mounting system combined with M3 retention screws. In automotive BIW applications where the robot cell floor transmits significant vibration from nearby stamping presses, the KVGA-1.0 has demonstrated service lives exceeding 80,000 operating hours in documented field installations.
Thermal performance is validated across the full KRC cabinet operating range. The board draws minimal power and generates negligible heat of its own, but it must tolerate the thermal environment created by adjacent drive electronics — peak cabinet temperatures of 50–55 °C are normal in summer operation without supplemental cooling. The KVGA-1.0 is rated for this environment without derating.
For operations in coastal or high-humidity environments — common in Southeast Asian manufacturing facilities — the conformal coating provides meaningful protection against salt-laden air and humidity-driven corrosion on PCB traces. This is a documented failure mode on non-OEM replacement boards that lack this coating.
Global Express Logistics
Our dispatch warehouse is located in Xiamen, Fujian Province, China — one of the most logistics-connected export hubs in Asia, with direct DHL and FedEx gateway access and established customs clearance procedures for industrial electronic components.
Standard Export Process:
- Order confirmed → same-day commercial invoice and packing list generation
- ESD-safe anti-static bag → foam-lined carton → outer corrugated box with fragile labelling
- Export customs declaration filed as “Printed Circuit Board Assembly — Industrial Automation Spare Part” with accurate HS code for smooth clearance
- DHL Express or FedEx Priority label generated and handed to carrier same day (orders confirmed before 14:00 CST)
- Tracking number sent to buyer within 2 hours of carrier pickup
Typical Transit Times from Xiamen:
- Germany, France, Italy, Spain: 3–4 business days (DHL Express)
- USA, Canada, Mexico: 3–5 business days (FedEx Priority International)
- Australia, New Zealand: 4–5 business days (DHL Express)
- Southeast Asia (Thailand, Vietnam, Indonesia, Malaysia): 2–3 business days
- Middle East (UAE, Saudi Arabia, Qatar): 3–4 business days
- South America (Brazil, Argentina, Chile): 5–7 business days (subject to local customs)
All shipments include full commercial documentation: invoice, packing list, certificate of conformity, and country of origin declaration. For customers requiring DDP terms, contact us before placing your order — we support DDP on most major trade lanes.
Emergency same-day dispatch is available for orders confirmed before 10:00 CST with payment cleared. If your line is down and every hour counts, call or WhatsApp us directly — we will prioritise your shipment.
Contact Information
Email: [email protected]
WhatsApp: +86 18359268345
Web: siemensplc.com
© 2026 siemensplc.com. All rights reserved.
Ready to quote
[email protected]
Send This Part Number to Sales
RFQ workflow
Quality workflow ->
Confirmation Process
01Model confirmation
We check the full part number, brand, series and visible nameplate information before quotation.
02Availability reply
Sales confirms stock path, condition option, quantity and realistic lead time for export dispatch.
03Packing & courier
DHL, FedEx, UPS or buyer courier arrangements can be reviewed with packing requirements.
Continue sourcing
Browse full catalog ->
Related Automation Parts
Similar brand or category products for fast comparison and multi-item RFQ lists.